  ® ®
|
Synchronization A two-part series |
Folks are intimidated by carburetor synchronization and seem to deliberately avoid it. Yet well-synced engines are much more pleasant and most vintage Hondas are very easy to sync. Try an early V4 or a six-cylinder CBX1000. Those are a challenge! Even so, the CBX1000 doesn't require 30 minutes as I hear folks saying they spend doing the job on their bikes. 1 If syncing really takes that long, chances are good when the job is done the carbs will not be synchronized, and the gauges will act as if possessed, because the engine will be so hot by that time, the procedure will not work. An overheated engine will not sync. 2
The goal of carburetor synchronization
The act of carburetor synchronization
Wire?
How to synchronize carburetors So here's the technique career techs use. Ready? Six things. 1) We never watch the gauge as we turn the screw, 2) we never turn the screw more than one-sixteenth turn (i.e. just perceptible) at a time, 3) we never loosen the locknut (if so equipped) more than required to just barely be able to turn the screw, 4) we tighten the locknut only very gently snugged, 5) we always "blip" the throttle to settle the loosey-goosey linkage, 6) and only after all these steps do we look at the gauge. And a seventh was mentioned earlier: don't let the engine overheat. This is the procedure that has worked for me for more than twice as long as many of today's mechanics have been alive. And let's see, in more than 50 years at it, 20,000 syncs, maybe? Let me break these six steps down for you. 1) Don't watch the gauge. Why? If you try to dial the adjustment while watching the gauge, you'll just be frustrated because you'll overshoot each time. Believe me, when you snug the locknut on a perfect gauge reading the reading will move, and it will move again when you blip the throttle. Count on it. Just the way it is. So, initially look at the gauge only until you know you're turning the screw the right direction, then look away. Turn the screw a smidge, then snug, blip, and lastly, look. 7 2) The smidge. The fact is, the tiniest adjustment is amplifed by a power of three or more. Imagine that all the linkage under your hands is made of rubber. It's not of course, but this mental picture will help. Never turn the screw more than 1/16 turn. Unless of course one gauge is showing five increments different from the rest. Use common sense. But once they're within a few increments, 1/16 turn is the correct adjustment. No more. 8 3) The locknut. Loosen the locknut only enough to allow movement of the screw, i.e. not quite fully loose. Trust me, this works, though it may seem counterintuitive. A pro uses two hands, one turns the screw just that smidge while the other holds the almost-but-not-quite-loosened nut stationary. Then the nut is gently snugged, while the screw is held motionless. To see a pro do this, well, it looks kinda artful. :-) Very fluid. Never leave the nut completely loose during syncing. 4) Snug. Tighten the locknut only snug. It must be snugged before you can consider the actual adjustment of the screw complete. Believe this one fact and you're halfway to being professional. And only snug, no more. It's not going anywhere. Don't reef on it. 5) Blip. Blipping the throttle is mandatory after each touch of the tool to the sync adjuster. The springs and whatnot make this necessary. Don't skip it. 6) Read. Only after all these steps do you take a reading of the gauge. Only after the slight nut loosen, 1/16 turn, snug and blip. Only then is the gauge looked at because only then is it indicating reality. This is the pro way. The temptation is strong to shortcut this process, but the end result of doing so will be a much longer time reaching perfect synchronization, if you ever do. Not to mention a ton of frustration. And it takes longer to describe it than to do it. A pro does most bikes' carb sets in less than 5 minutes to a spec of under 1/4 of one increment. Yes, I said 5 minutes. Max. Will it take you longer? Most likely. So use a fan.
Synchronization does not stand alone
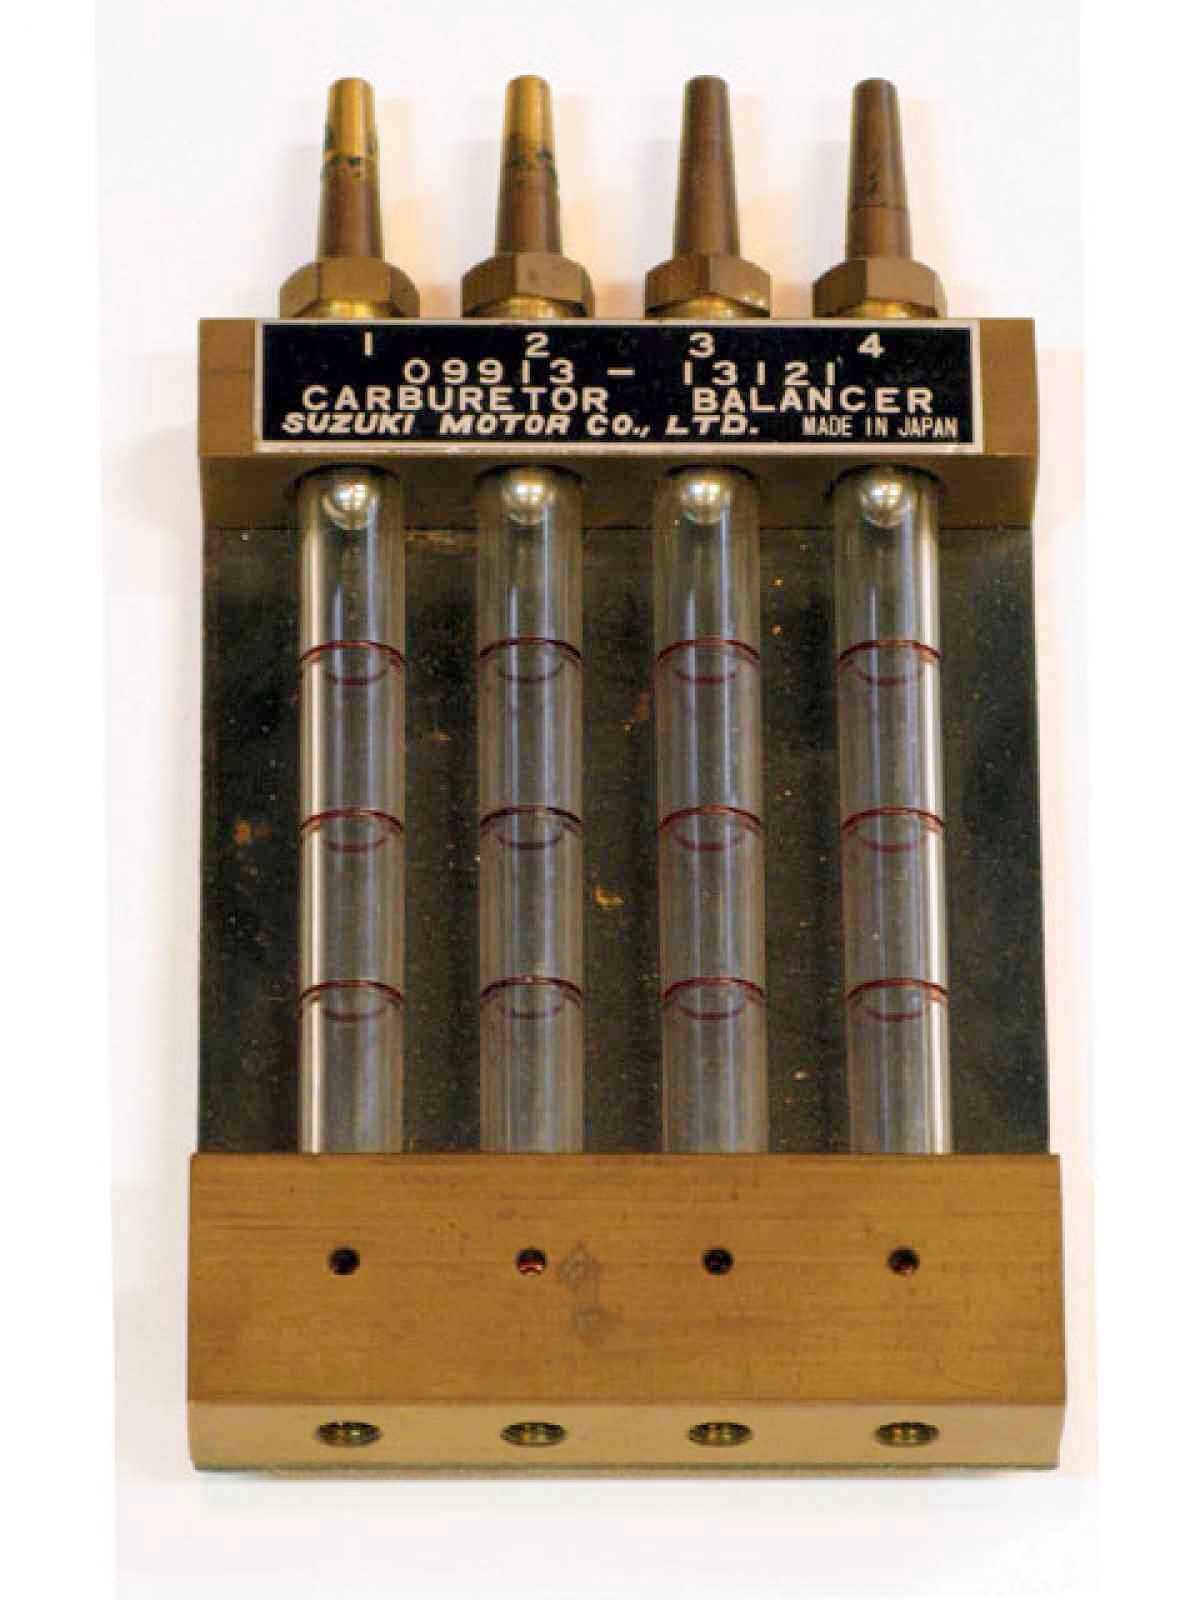
Synchronization measuring tools Not long ago a friend loaned me his motorcycle so I could create a video. A few days after getting it back to him he called me. "What did you do to my bike?", he asked. Oh oh, I thought. What did I mess up? He said, "It's never run this good." Oh. Good. "Well, all I did was sync the carbs. It made that much difference, huh?" He was genuinely pleased, not to mention surprised. He had had a considerable amount of work done on the bike and apparently it had never been adjusted so well. Why is a mystery. 10 I hope this is useful. Syncing carbs is not intuitive, but it's not really all that difficult either. And it's not an option if you want the full experience the machine is designed to deliver. Yet a huge percentage of the vintage riding public struggle with their carburetors each riding season. Becoming familiar with Sta-Bil will relieve 90 percent if this. "Take 2 ounces and call me in the morning." And many know firsthand how just a little informed attention results in smoothness, acceleration and satisfying performance. Let me encourage you to resolve to do this thing right, and let that bike really shine!
Notes: 2 This is something every beginning mechanic learns. When the engine overheats the intake pressures -- thus the measuring gauges -- become unstable and the mechanic loses control of the process, not to mention his sanity. 3 Of course, idle and throttle response are important enough by themselves. On larger displacement bikes especially, whose operation regardless of gear position or throttle opening is mostly dependent on the idle jet, idle and response characteristics are everything, the holy grail. The finishing touch on an engine tune. There have often been attempts to sync carbs at various open-throttle positions, but I know of only one model bike on which that is a fruitful endeavor. As a rule, carb linkage just doesn't allow that to work. You can sync at idle or you can sync at a chosen open throttle position, but you can't do both. Idle is the important thing. 4 Fuel injection throttles present a good illustration. The throttles on many modern bikes are built in rigid fixed alignment. No adjusters. Yet the cylinders still require syncing. They're synced by means of adjustable air bleeds that increase or decrease the total airflow through the intake port. 5 The wire trick needs to be permanently retired. It originated in pushrod Brit bike manuals and applied only to mechanical slide type carburetors. It wasn't so hot a method even for those carbs, though at least it didn't tear them up like it does when used on CVs. Nasty, misapplication, this. 6 Note that there is no "master" carburetor. The idea of a master carburetor has merit on only a very small number of motorcycle models. Very very few. 7 I can't emphasize this enough. If you watch the gauge while turning the screw, you'll land in the insane asylum before you land in syncing nirvana. Like all pros I thought this was obvious until I read so many postings on forums about doing this, to us, strange thing. 8 Snugging the locknut each time the screw is moved has to be drilled into your mind as inextricably linked to turning the screw. Never one without the other. It's really one step, not two, in the sense that you must not consider the adjustment complete until the nut is snugged. 9 I know that this late in history everyone is thought to agree with this, but I see little evidence of that everywhere I look. Syncing carbs is never to be something done in isolation; by itself. Many vintage Honda owner's manuals give just 3,000 miles as the intervals at which valves, ignition and carbs are to be checked and if necessary adjusted. If every year or two you're suddenly thinking you should sync your carbs you're going about it all wrong. This is surely one more reason you're having difficulty. Syncing is part of a maintenance triad and was never meant to be a solitary adjustment. 10 The bike was a CBX1000. Not the most difficult to sync (that would be the Honda V4) but like most multis it responds well to careful synchronization. |
Email me
www.motorcycleproject.com
My bio
© 1996-2026 Mike Nixon