 Motorcycle carburetors enjoy almost as much mystery and folklore as do motorcycle camshafts, and suffer commensurately, often at the hands of folks who should have their tools taken away, or maybe just their user forum logins. :-) Following are a few instructive points regarding what people "know" about carburetors that isn't worth knowing.
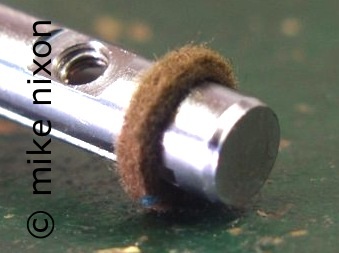
Throttle Shaft Seals
There is a lot of sentiment on the 'net that failed felt seals on Keihin and Mikuni carburetors are responsible for idling issues, and it's possible that they can be. However, in practice, in over 42 years of working on these carbs, I have seldom had reason to replace the seals, and I don't say that in an offhand way. I have vacuum tested throttle shafts on 30 year old original seals (in the course of checking for symptoms) and they invariably seal very well. Now, from time to time new seals are in fact needed when someone has torn them by removing them when they didn't need to be and shouldn't have been disturbed. And so I keep them in stock for just this reason. But the hand-wringing being promoted on the Internet is all wrong. They aren't that big a deal. Another thing to keep in mind is this -- fussing with these seals is not only unncessary and ill-advised, it also, because it entails removing and reinstalling the throttle shafts, is all the more a really bad idea. Motorcycle carburetor throttle shafts are brass, so they're soft. Now add to this the fact that they are slitted much of their length to receive the throttle plate -- and don't forget, drilled too -- and you have an excruciatingly delicate shaft, more a reed, really, that is all too easily twisted, particularly when loosening and tightening their fixing nuts. In fact, the tightness of these nuts more often than not makes twisting of the shafts inevitable (which of course lends credence to the idea that these carbs, as so much today, aren't made to be serviceable -- but we stolidly march onward...). Even a twist that is imperceptible visually will make the carbs/engine not idle correctly and be impossible to synchronize, a problem in fact that is all too common on one particular Honda model, and never far away on any carburetor.
Rejetting
Exhaust manufacturers are blessed with a market that totally misunderstands reality in favor of myth, and one that works in their favor to perpetuate sales. It is grossly misunderstood on the Internet, with all its hype in favor of aftermarket exhausts, but carbuetor rejetting is mostly and often almost exclusively a matter of intake configuration, not exhaust. That's right. The exhaust system has very much less to do with carb jetting than does the intake system, on the order of multiple times. That is, the intake counts many time more. For example, fitting pod (individual) type air filters creates a need for rejetting on some carbs as many as 20 main jet sizes! Which exhaust does that? None. Most of the exhausts available for vintage motorcycles make absolutely no demand on carburetion, let alone 20 jet sizes. The uncommon, exception-to-the-rule aftermarket exhaust (mainly by dint of being painfully loud) may require 1 or at the most 2 main jet increases, but again, usually not even that. I go into detail some of the reasons for all this in my other articles, so check them out.
Cleaning Methods
There is quite a lot of misinformation floating around regarding the cleaning/rebuilding of carburetors. Take just the cleaning, for example. Some propose that dipping carbs in chemcial dip is harmful to them. But it really isn't. Do these folks really believe that in over 100 years of experience this would not have come to light? Chemical dip cannot possbibly harm the metal, or for that matter the felt seals in motorcycle carbs. Where you get into trouble is on older carbs having plastic pegs in their slide bores. This would include quite a few older Honda SOHC four carbs, and the earliest Goldwings (GL1000). The solution is to carefully limit the exposure (dip) time, though this of course reduces effectiveness also. Also at risk of course are any rubber seals and of course o-rings, but any halfway diligent person removes these and any rubber or plastic bits in the process of the rebuild. Chemical dip can present difficulties in other areas as well, such as electrolytic reaction that stains the metal, if the carbs are left in too long. This has been well known for so long it isn't even funny. Ultrasonic cleaning, for its part, is gaining in popularity, and with good reason, though few understand just how effective it really is. It's simply the best method there is, with all the benefits of chemical dip and none of its drawbacks. Beware however of those recommendations to use Simple Green in the ultrasonic tank. Simple Green is hugely high PH and will therefore react with cast aluminum badly. Likewise any of the variously colored Simple Green copycats. They're all strong vinyl floor detergents, just like Simple Green (originally a janitorial product). If you're using Simple Green, you will have noticed the white fuzz that appears on the carb castings. Guess what? It's on the inside, too. Avoid it. If you cut the Simple Green down enough to minimze the fuzz, say below a 5:1 ratio, you might as well save your money and use a few drops of dish soap instead. You could also add some vinegar to your Simple Green to lower its PH, but again, you'd be ahead to just use distlled water and a few drops of Palmolive. Here's another myth. It is ludicrous to think that ultrasonic's benefit is that carbs can be cleaned intact. There are so many passages that need visual verification, so may recesses that can trap water, and so many parts that need replacement and adjustment...well, you get the idea. I have an article on the wonders of ultrasonic cleaning, so check it out.
Carburetor Rebuilders
Most people seem to hold carb rebuilders in fairly low esteem, thinking of them in the same terms as the guy that puts the tires on your car. I'm not taking anything away from folks who make a living any way they can, but doing the correct job on a set of motorcycle carburetors, including knowing what each circuit does, how to correct issues that arise from miles and use, and how to correct the few the factory induced, being familiar with the bike and not simply the chunk of carburetor, knowing where to source replacement parts and which are good and which are not, and much more -- all of this makes a carburetor rebuilder an artist, almost a surgeon, not simply a parts replacer. This needs emphasis because the past few years have seen a proliferation of folks rebuilding motorcycle carburetors for hire. Sadly though, many are like the tire changer -- they can get the job done, but do they know the bike? Do they have history in the industry? Do they even understand carburetors all that well? Do they have the almost obsessive compulsive meticulousness carburetor work requires?
The Shop vs. The Dedicated Rebuilder
It may seem strange that professional carburetor rebuilding should take as long as it does, a week, two weeks, even longer for the more exotic carburetors such as the CBX's. It is particularly perplexing to some that most dealerships can do the job in just a couple hours, so why can't the carburetor specialist? But the comparison between what a general repair shop does and what a dedicated carburetor rebuilder does is a very unequal one. Night and day, in fact. Dealership carburetor work could best be defined as "making do.". They make do on gaskets, they make do on float valves, they do not take the time to test each circuit the way a fulltime rebuilder does. Honda CBX carbs for example take from 20 to 25 hours. You know a shop can't afford to spend that kind of time, even it the tech knew enough to do so, and of course, they don't. I didn't and I was factory certified.

