|
|
|
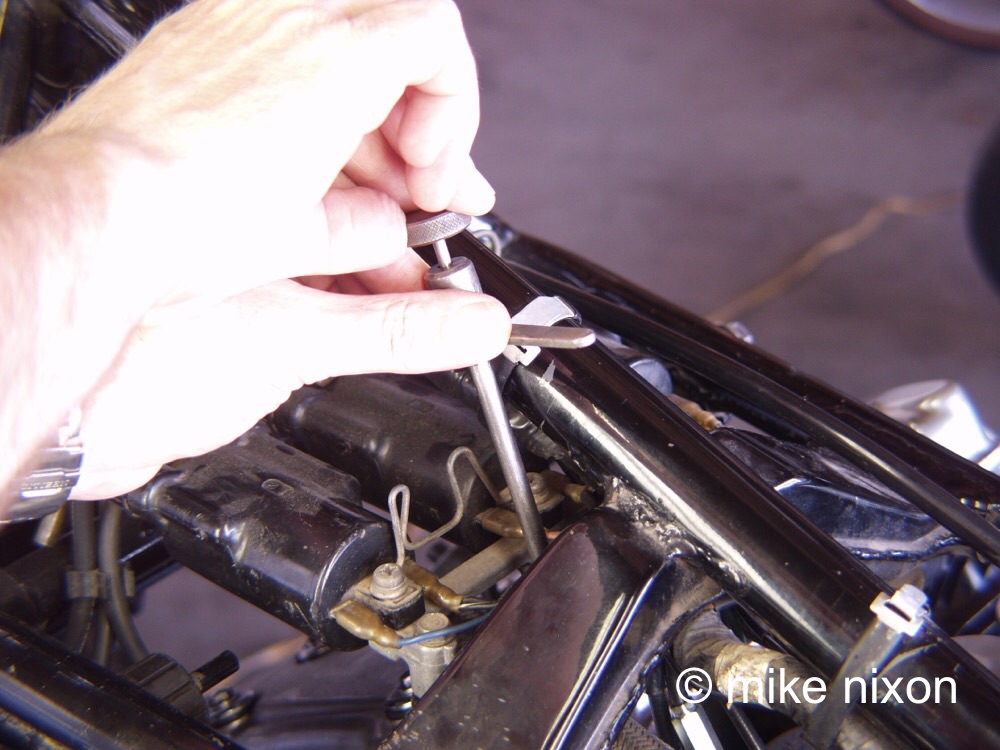
This is one of the most challenging parts of synchronizing the CBX carburetors, syncing the 3/4 carbs. Note that nearly the whole length of the tool is swallowed up by the bike. Also, the tool necessarily touches the frame and or ignition coils, reducing the tactile feedback so important in doing this job.
|
The goal of carburetor synchronization
Some folks are confused about carburetor synchronization. Syncing doesn't heal a sick bike. For an already well-tuned engine, it accomplishes just one thing: a smooth, steady idle. That in turn results in the secondary benefit of a satisfyingly crisp throttle response. Sync has absolutely nothing to do with open-throttle performance. Idle and a bit more. That's all.
Bench synchronization
Bench-syncing carbs that have been removed from the bike is a good preemptive step to a running sync. But do the bench sync right. I replace a handful of throttle plates (butterflies) each year because someone has stroked wire or another object under them. The CBX's throttle plates were never available separately (I have to buy spare carburetors to get them) and you have just ruined your carburetors. The plates are exquisitely angle-machined around their circumference. Rubbing wire on that knife-edge puts a notch in it that introduces air where it shouldn't be and irreparably damages them. Do what the pros do: bench sync using the first idle bypass hole.
What is being synchronized
Think about this one thing. After your carbs are perfectly synced, why would they ever need syncing again? Because of wear in the carb linkage? Nope. Why then? Because of gradual changes in the engine. Absorb that fact. The throttles are perfectly synced, yet the engine just a few thousand miles later "says" they aren't. Here's the deal: synchronization is NOT merely aligning the individual throttles. It's true that when the carburetors are synchronized on the workbench, we perfectly align the throttles. But when doing a running sync we are syncing vacuum levels, which approximates airflow, not the position of each throttle plate, and airflow is determined by much more than mere throttle position.
Fuel injection throttles present a good illustration of this. The throttles on many modern bikes are built in rigid fixed alignment. No adjusters. Yet the cylinders still require syncing. (They're synced by means of adjustable air bleeds that increase or decrease the total airflow through the intake port.)
So if some cylinders for example have 20 psi less compression or slightly different ignition timing, then to compensate, those cylinders' airflow will actually need to be made slightly out of mechanical sync in the process of achieving perfect gauge-monitored airflow sync. Make sense? The throttles don't have to be perfectly matched to achieve exactly the same airflow, and fairly often they must actually *not* be. This principle of syncing airflow and not the actual throttle plate also explains why an overheated engine won't sync. Temperature affects air density which affects airflow.
Engine heat
That's right, an overheated engine's carbs will not sync. The CBX is an extremely hot-running engine. If it takes you longer than 5 minutes to sync its carburetors, the engine will overheat. Not only is this bad for the piston rings, gaskets and the engine's rubber parts, it also will make further syncing attempts futile. Every beginning career mechanic knows this; don't think you're smarter. Put a 24" box fan on the engine. Even two.
Synchronization does not stand alone
You *must* have everything else in the engine perfect before synchronizing your carburetors. Not doing so is like putting cake icing on top of a pile of mud. Despite the great icing, you have a lousy cake. Cylinder compression for example. The CBX needs at least 150 psi compression to run properly. If you have less, you are wasting your time doing anything else tuning-wise, including carburetor syncing. Your engine needs work (as delivered, the CBX produces 170 psi compression). Also make sure of your ignition timing. This is probably the most out-of-the-box maintenance chore you will perform on your CBX. Honda didn't make it easy, the engine requiring as it does a degree wheel in old pushrod Triumph fashion.
|
|
|
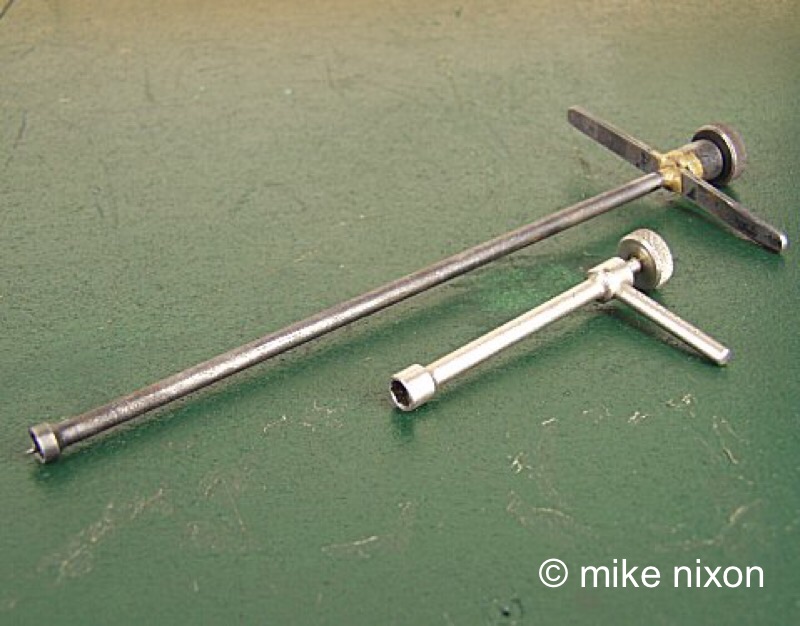
Two special tools are needed to synchronize CBX carburetors. Shown are the two factory tools. Substitutes are possible, but two will always be needed, a long and a short.
|
Synchronization tools
You need two adjusting tools to do CBX sync, that is, two wrenches. The short one in addition to the long one. The short one is needed for the 5/6 adjuster. It has been discontinued forever, but once in a while I hear from folks who have found it overseas. A lot of people try to use the long wrench for 5/6 but though possible, this tears up the locknut on that adjuster. This is not acceptable.
Speaking of the sync screws, the CBX has five sync adjusters buried so deeply in the carb set that one of them is over a foot below the frame rail and has to be found by feel. This is perhaps the most challenging part of syncing the CBX.
The gauges you use are important. See my sync gauge comparo here. The old-school mercury sticks are still available but they are difficult to store, the mercury columns absorb water, and the plastic tubes eventually craze to the point of becoming opaque. There are other liquid column type gauges too, as well as metal ball and metal rod instruments. The rod type is familiar as the brand name Carbtune, but its accuracy is in question. Then there are electronic gauges, both LED and LCD. These were my favorite when I taught mechanics but I didn't have to buy them -- they're pretty expensive. Lastly, there are still good old mechanical pressure gauges. Nothing wrong with mechanical gauges, nothing at all -- as long as each gauge has a calibration screw on its face. That's the only kind of mechanical gauge system worth having.
Pilot screw adjustment
Don't forget the pilot screws. I like the pilot screws at 2 1/2 turns on the CBX. This has to be done before syncing. This setting works very well, corresponding as it does to the correct 3 percent CO (carbon monoxide) this engine wants. Use that figure if you have access to an EGA. If you have 150 psi or more cylinder compression (lucky you!) *and* you removed the carbs' idle jets to clean them, then use 2 turns instead, a little less if at an altitude over 5,000 feet. If none of these things are true in your case, then 2 1/2 turns will be right.
Carburetor synchronization
This is important. The sync screw is not a micrometer. It does not respond to X amount of turn equals Y amount of change on the vacuum gauge. The CBX's sync system is sloppy. What with plastic bushings, springs everywhere, very flexy parts and fairly loose tolerances, syncing carbs is pretty fiddly. Consequently, the pro does not watch the gauge while turning the screw.
Here's the technique career techs use. Ready? Six things. 1) He never watches the gauge as he turns the screw, 2) he never turns the screw more than one-sixteenth turn, 3) he never loosens the locknut more than that required to just barely be able to turn the screw, 4) he tightens the locknut only very very gently snugged, 5) he always "blips" the throttle to settle the loosey-goosey linkage, 6) and only after all these steps does he look at the gauge. And remember: don't let the engine overheat. Let me expand on these six things.
1) Don't watch the gauge. Why? If you try to dial the adjustment while watching the gauge, you'll just be frustrated because you'll overshoot each time. Believe me, when you snug the locknut on a perfect gauge reading the reading will change, and it will change still more when you blip the throttle. Count on it. Just the way it is. So, initially look at the gauge ONLY until you know you're turning the screw the right direction, then look away. Turn the screw a smidge, then snug, blip, and lastly, look. If you watch the gauge while turning the screw, you'll land in the insane asylum before you land in syncing nirvana. Like all pros I thought this was obvious until I read postings on forums about doing this to-me strange thing.
2) The smidge. The fact is, the tiniest adjustment is amplified by a power of three or more. Imagine that all the linkage under your hands is made of rubber. It's not of course, but this mental picture will help. Never turn the screw more than one-sixteenth turn. Unless of course one gauge is showing five increments different from the rest. Use common sense. But once they're within a couple increments, one-sixteenth is the correct amount. No more.
3) The locknut. Loosen the locknut only enough to allow movement of the screw, i.e. not quite fully loose. Trust me, this works, though it may be counterintuitive. A pro uses two hands, one turns the screw just that smidge while the other holds the almost-but-not-quite-loosened nut stationary. Then the nut is gently snugged, while the screw is held motionless.
4) Snug. Tighten the locknut only snug. It must be snugged before you can consider the actual adjustment of the screw complete. Believe this one fact and you're halfway to being professional. And only snug, no more. It's not going anywhere. Don't reef on it.
5) Blip. Blipping the throttle is mandatory after each touch of the tool to the sync adjuster. The springs and whatnot make this necessary. Don't skip it.
6) Read. Only after all these steps do you take a reading of the gauge. Only after the slight nut loosen, one-sixteenth turn, snug and blip. Only then is the gauge looked at because only then is it indicating reality.
This is the pro way. The temptation is strong to shortcut this process, but the end result of doing so will be a much longer time reaching perfect synchronization, if you ever do. Not to mention a ton of frustration. And it takes longer to describe it than to do it. A pro does it in less than 10 minutes to a spec of under one-third of one gauge increment. Will it take you longer? Most likely. So use a fan.
|
|
|
|
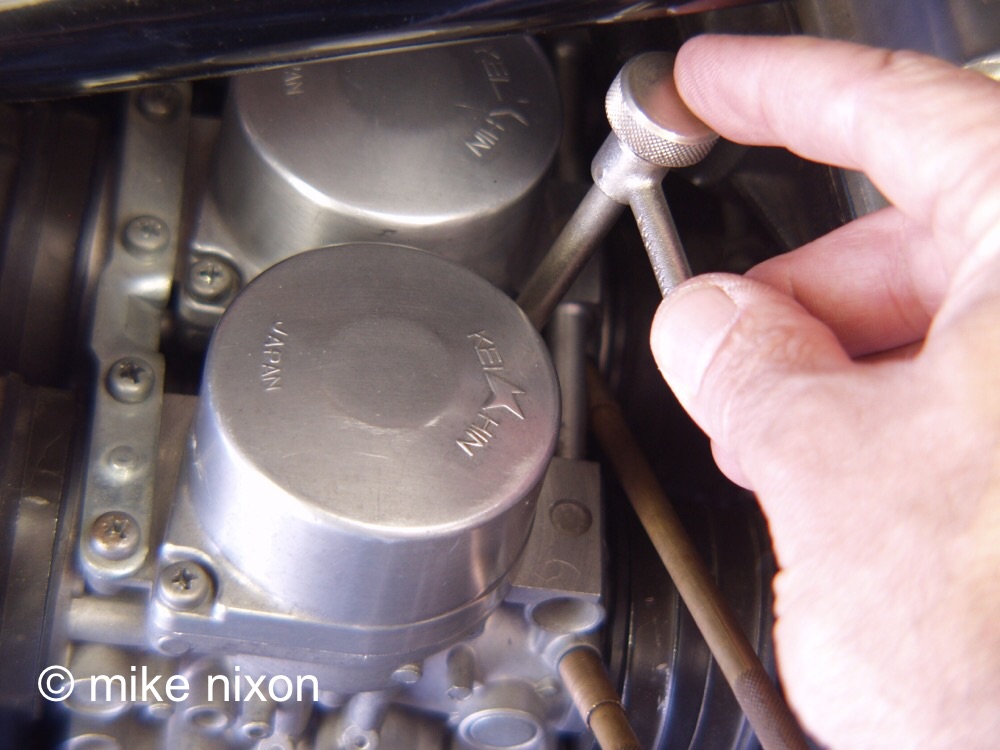
Here's why the short tool is needed. The 5/6 adjuster is directly under the right frame rail.
|
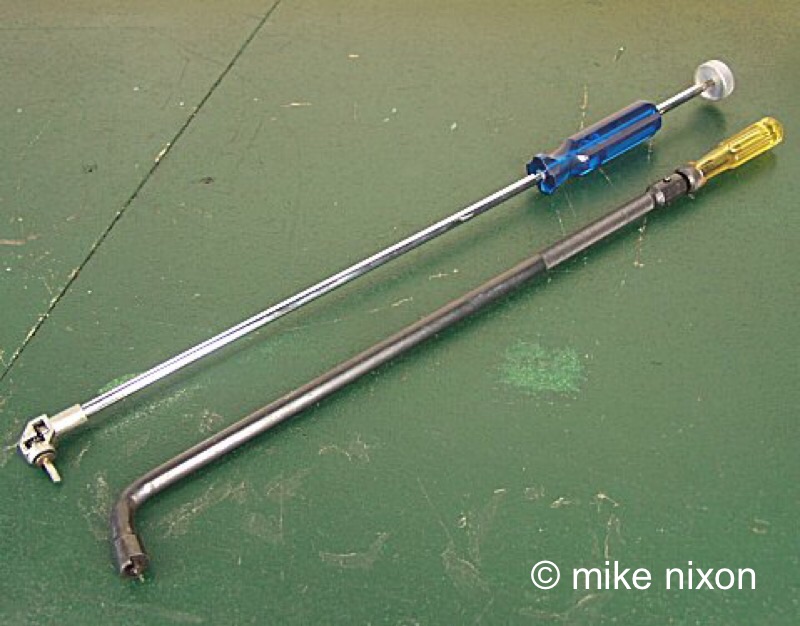
A pilot screw adjuster is needed even before synchronizing begins. The upper on is an American-made tool, the lower one is the factory tool.
|
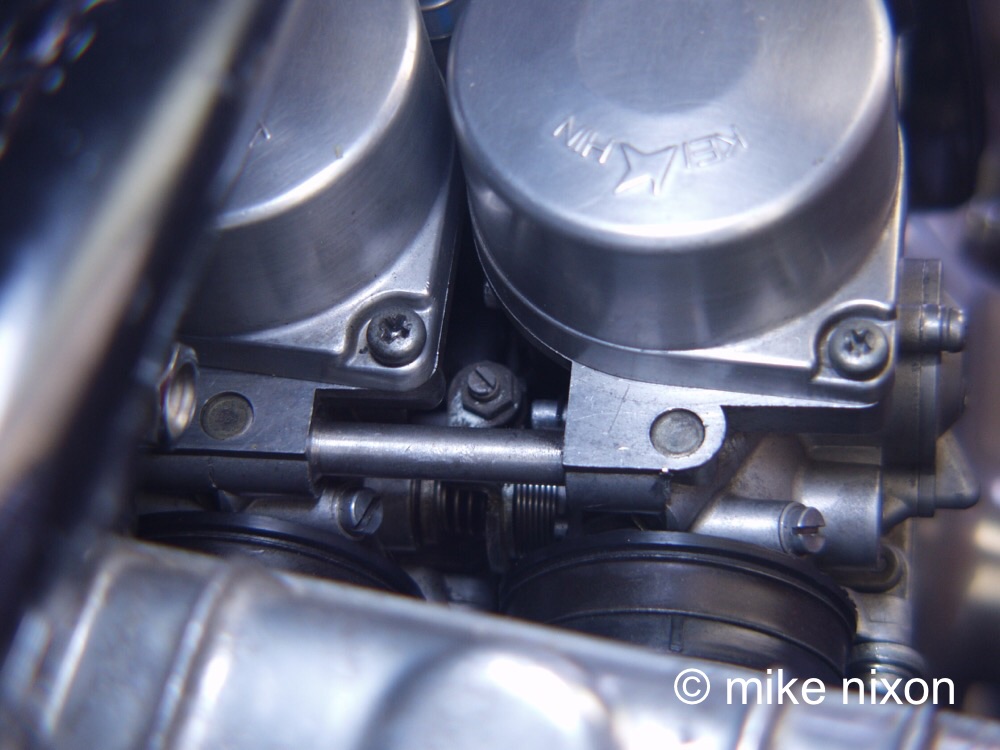
This shot shows where the sync screws are located, between each pair of carburetors. The angles each screw points toward alternate forward, rearward, forward. That is, the tool approaches the carbs from the front, then the rear, then the front again.
|
Final thoughts
This is the procedure that has worked for me for more than twice as long as most of today's mechanics have been alive. And let's see, in more than 50 years at it, more than 10,000 syncs, maybe? Here's something else. Not long ago a friend loaned me his motorcycle so I could create a video. A few days after getting it back to him he called me. "What did you do to my bike?", he asked. Oh oh, I thought. What did I mess up? He said, "It's never run this good." "Well, all I did was sync the carbs. It made that much difference, huh?" He was genuinely pleased, not to mention surprised. He had had a considerable amount of work done on the bike--hot rod engine work especially--and apparently the carbs had never been properly synchronized. Don't be a low performance mechanic; you know, putting all kinds of bang and bling on your bike and neglecting the basics. And don't minimize the effect good standard tuning--which includes regular carb syncs--has on the CBX.
|
|
|
|

 ®
®
