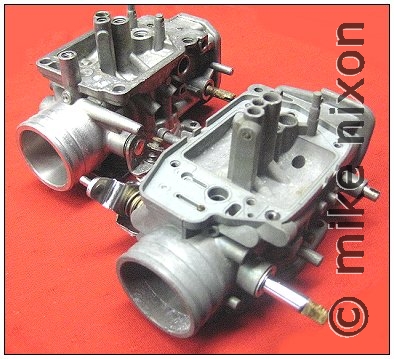
Carburetors are especially at risk of thread damage if made before the middle 80s. Carbs made before then have an unusual amount of zinc in their aluminum alloy. Zinc was used by manufacturers to make molten aluminum more pourable before modern technology dictated vacuum processes. Honda's GL1000 carburetors are high zinc, just like their other carbs of that era - SOHC four, for example. In fact, a stripped GL1000 carb casting weighs exactly twice as much as a similarly prepped GL1100 casting, due to the former's rich zinc content.

|
A quick scan of the Internet will show that there is a battle waging over the best way to repair threads in automotive/motorcycle parts (just as there was long before the Internet existed), with bitter words being exchanged in the Timesert vs. Helicoil camps. Interesting, there are many other brands of thread inserts, but these two have come to represent the two styles that characterize all of them.
|
|
Few forum posts mention carburetors however. The issue doesn't arise very often, and carburetors can be the most difficult of parts to repair threads on. There just isn't much room in their compact castings before the threading tools bump into adjacent circuits and things.
|
|
When I was introduced to the Timesert product in the early 1970s while at Trade-Tech, virtually everyone had heard of Helicoil. Honda even sold a Japanese licensed version of them for many years. But almost no one had heard of Timesert, and the situation hasn't changed much almost fifty years later. Maybe they need better marketing or something.
|
|
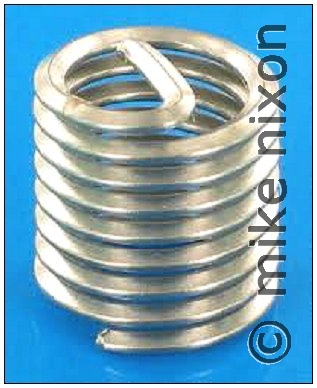
Legend has it that Timesert's main competitor and the 800 pound gorilla in the market, Helicoil, was invented in the airplane's early days by a mechanic who in exasperation wound some safety wire around a troublesome bolt and jammed the combination back into the hole. True or not, the Helicoil fits this principle suspiciously closely, the major difference being now the wire is diamond cross section.
|
|
I find a number of things not to like about Helicoils. First, installation requires oddly Rube Goldberg-esque tools and a high degree of skill (luck?) to avoid the wire's tendancy to skip threads as it is inserted. After all, it's just a tiny Slinky....
|
|
Moreover, the sole locking mechanism in a Helicoil is the snap-off tang at the bottom which leaves a sharp edge that presumably grips the repaired hole internally. But it doesn't, really. Countless numbers of mechanics can relate stories of bolts that have been removed with their Helicoils attached. But there's more. Helicoils don't do well in holes that are not perfectly round (which no hole made with a drill ever is), and have questionable heat transfer characteristics, which is pretty important in spark plug application. Anything that affects the rate of heat transfer from the spark plug effectively changes the plug's heat range. Also concerning spark plug hole repair, the presence of the jagged wire end in the combustion chamber is an unwanted invitation to engine-damaging combustion preignition. My observation is that with the Helicoil's longer history, people connected with the machining, auto or aircraft trades often are the most likely to favor them over the more powersports oriented Timesert.
|

|
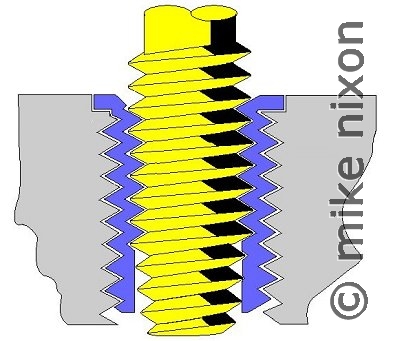
Timeserts on the other hand install pretty intuitively using four familiar-looking tools, and lock into place by the expansion of the insert against the interior of the hole. Being a solid bushing, the Timesert is a natural when it comes to holes that are not perfectly round, can be nested to accomodate jobs where the hole is too large, boast of admirable heat transfer characteristics, and is the insert type most recommended by the motor vehicle manufacturers themselves when it comes to spark plug hole repair.
|
|
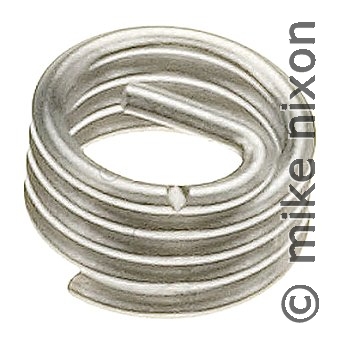
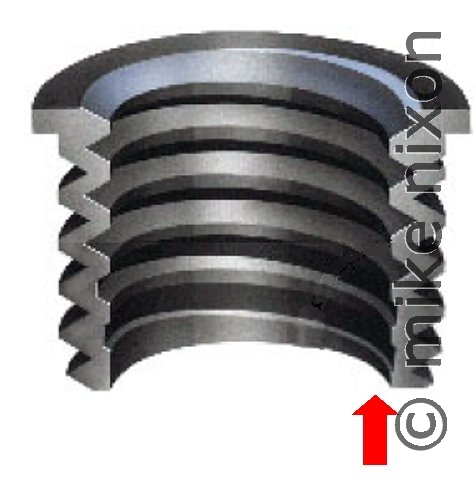
Unlike the Helicoil, the Timesert registers against the hole in two places. At its upper flanged end of course, but also at the bottom where Timesert deliberately leaves two threads unformed. These lower threads are formed during installation by one of the tools, thereby locking the insert into place.
|
|
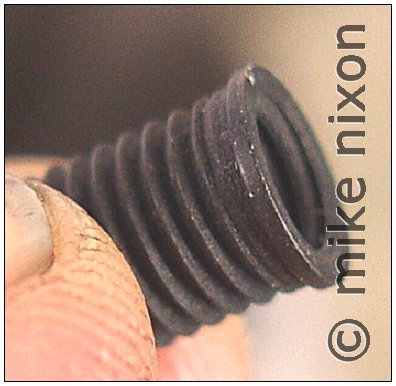
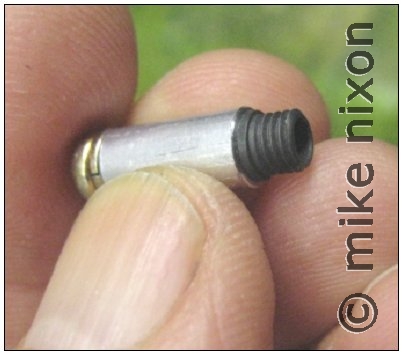
Here's a closeup of those unformed threads at the bottom of the insert. In this picture you can also see where the Timesert got its name, from the fact that the insert's inner and outer threads are synchronized with each other, or "timed," which allows the part to have the least amount of bulk, something the company is quite proud of. The insert takes up the least possible room in your part.
|
|
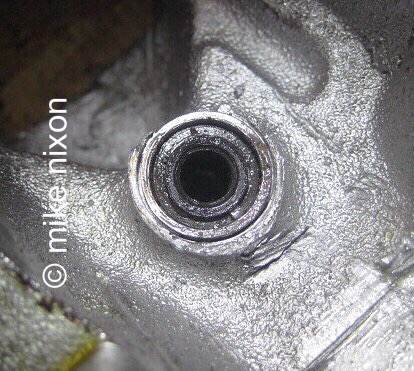
And this in turn provides another benefit: nest-ability. One of the best-kept secrets among career mechanics is that unlike other thread inserts, Timeserts are easily nested. That's a 6mm insert inside an 8mm insert inside a 10mm insert. Yup. Three inserts. Arguably this cylinder head should have been welded, but a nested insert repair is entirely viable and plenty durable. In fact, one of the Timesert's greatest advantages is its ability to do the job even in out-of-round holes and similarly challenging projects. Cool, huh?
|
|
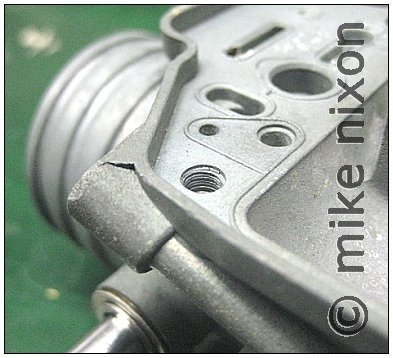
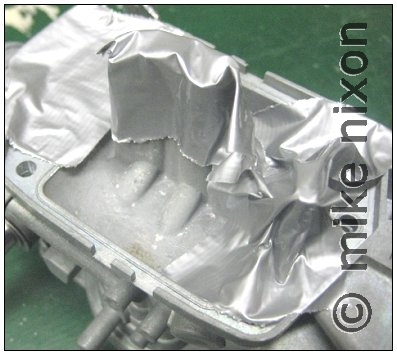
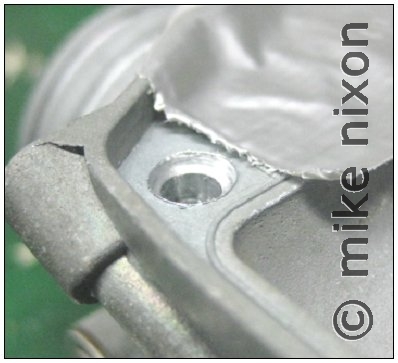
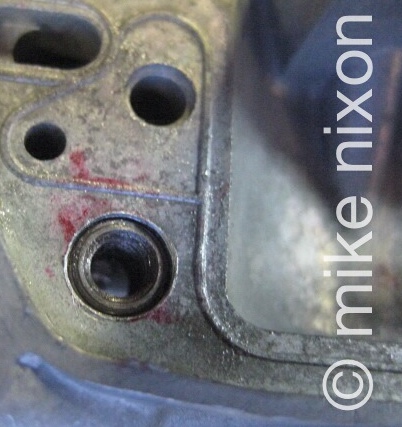
So let's install a Timesert. The installation process begins with taping up all the cavities in your carburetor casting you want to keep metal chips out of. Note also that this GL1000 carburetor is removed from its rack, though that isn't always necessary. But I do like to do the thread repairs during the cleaning process and not during reassembly when I can help it.
|
|
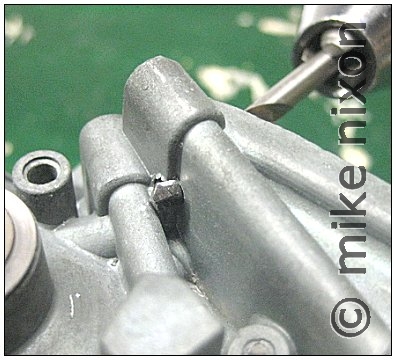
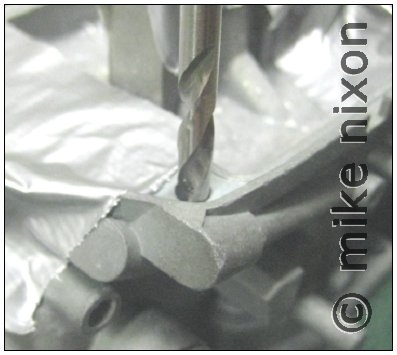
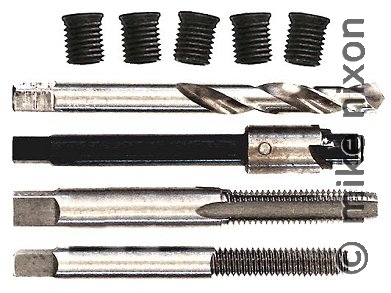
The first step is to drill the hole using the Timesert kit's included drill. The tool is designed to be used by hand, and that gives the best control. The hole is sized to the Timesert's special outer diameter.
|
|
|
Again, when drilling on a carburetor, you absolutely must pay attention to what you're doing. Where is the tip of the tool ending up? Inevitably, it will nudge some important passages in the carburetor, as is the case with this Gold Wing carb. Take it slow and keep you eyes open.
|

|
Step two is to create the new hole's counterbore. This will allow the insert to be situated flush with the carb casting. The depth of the counterbore is determined by the tool. However, be diligent. If you rely solely on the stop shoulder on the tool the counterbore will end up too deep, depriving the repair of important thread engagement.
|
|
This means you must visually gauge the counterbore, stopping every so often to check it. This is about the correct depth.
|
|
I like to check the depth using the insert itself. Flip it upside-down to see when the depth of the counterbore is enough to clear the insert's flange. Be sure to add a bit to account for the slight radius under the flange. If you don't, the insert will stop during installation before it is properly flush with the carb casting.
|
|
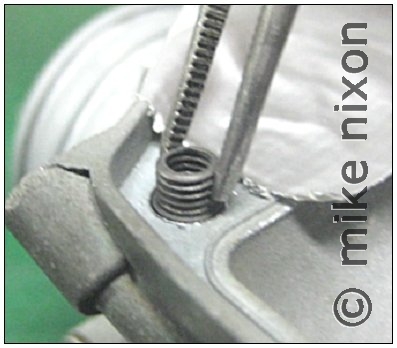
Step three is using the special Timesert kit tap that matches the insert. Treat this tool as you would any tap. Cut a little, back it off, and cut some more.
|
|
The tap makes a lot of chips, naturally, so do what you need to do to keep this swarf out of the carburetor's passages. And as always, watch where that tool is going. Careful.
|
|
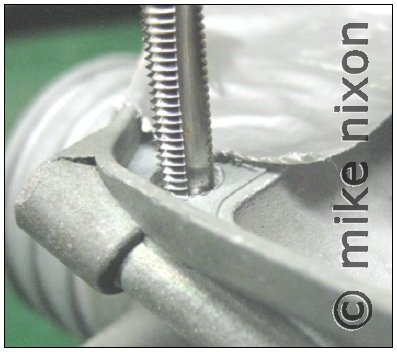
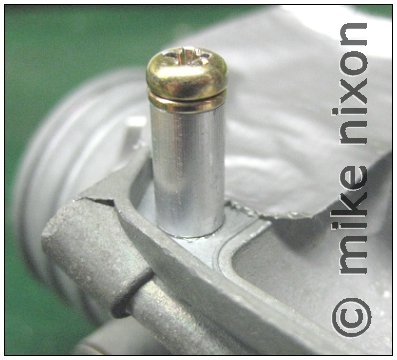
This next step is one I occasionally add to the process. Sometimes the insert will stop halfway during installation using the standard installation method. If that happens, you'll have no choice but to drill the insert out as it will be permanently stuck. To avoid any possibility of this I have a special bolt and bushing arrangement I use to drive the insert from its top side.
|
|
Like so. Once the insert is fully seated, unscrew the screw and bushing tool.
|
|
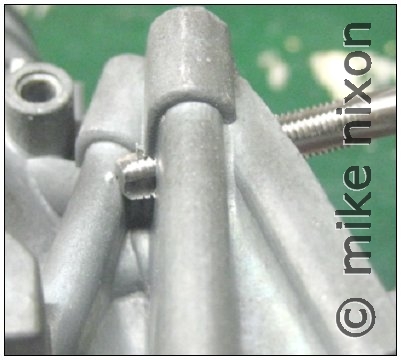
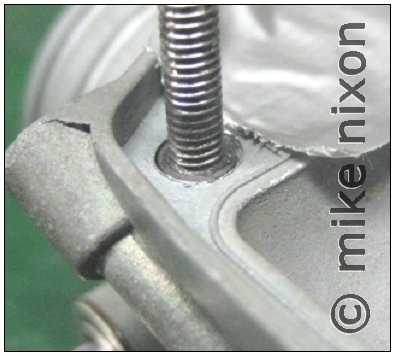
Once the insert has bottomed in its hole, you can go on to the official Timesert step of using the broach to permanently lock the insert into place. Be sure to put some oil on the broach before using it. Don't forget it pushes the unformed threads at the bottom of the insert against the hole. There is a lot of force here.
|
|
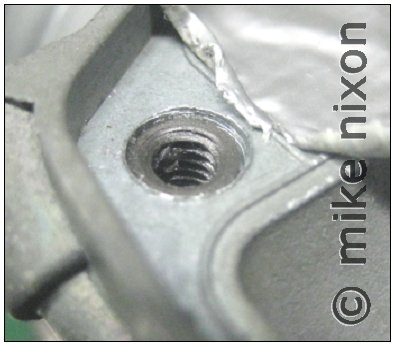
Using this five step process, I have had great success in using Timeserts in carburetors, engine cases, and all sorts of parts. GL1000 carbs as shown here always need at a few Timeserts. And there is none better than Timesert.
|
|
Remember what I said about Timesert's marketing. Finding this superlative product can be a challenge. Expect to pay more than $100 for a kit like this one, which typically includes a handful of inserts to get you started. Additional inserts are available, naturally. Internet sources include eBay and Amazon and various special tool outlets.
|
|
Naturally, I do a fair bit of thread repair on carburetors I rebuild. So if you need this service, don't hesitate to ask about it. Reach me at the email below or visit my website at www.motorcycleproject.com.
|