|
|
|
|
|
|
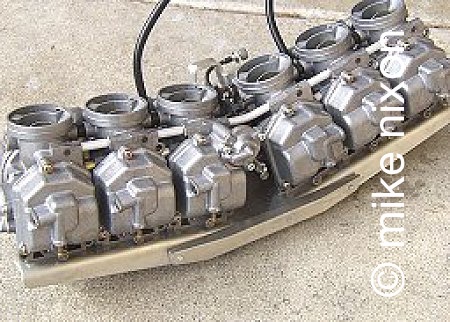
Drain the carbs well. It's really messy to work on them or even carry them around with a large quantity of fuel still onboard.
|
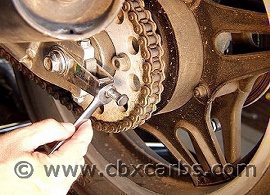
Remove the muffler hanger bolts, and wrap the mufflers in heavy towelling to protect them. Also loosen but don't remove the head pipe nuts. Loosen the rear axle and slacken the drive chain way up. In rare cases it may be necessary to remove the chain guard and slip the chain over the rear sprocket in order to gain enough slack to allow lowering the engine all the way.
|
Remove the engine main hanger bolt nut. Just the nut for now.
|
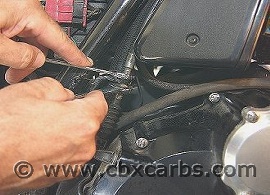
Remove the tach cable, clutch cable, spark plug wires and ignition wiring.
|
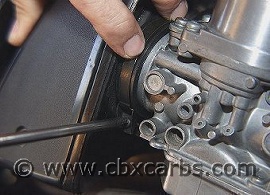
Loosen but don't remove the airbox clamps. Also loosen but don't remove the intake clamps, but only the ones against the carburetor, not those against the engine.
|
|
|
|
|
|
|
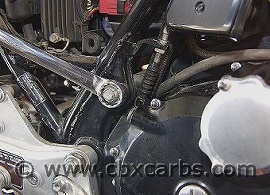
Put in a jack and gently take some of the pressure off the engine mounting bolts, and remove the two larger and two smaller upper engine mounts...
|
and of course now remove that back upper main engine bolt. If it resists, play around with the jack's pressure until it frees up and can be removed.
|
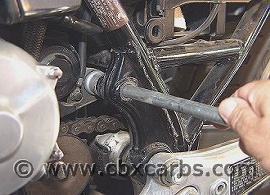
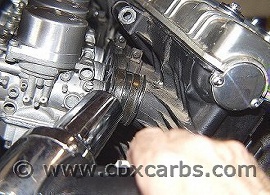
After using the jack to lower the engine enough to get about an inch and a half between the carbs and airbox, heat up the manifolds with a heat gun. Then put some wood against the engine and using a longish pry bar, pry against the carburetor set's heavy steel lower steady, as shown. This is the only area you should be prying against, and the only part of the carburetor designed to take this kind of force.
|
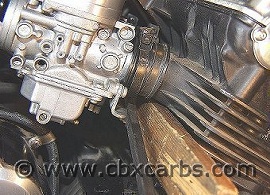
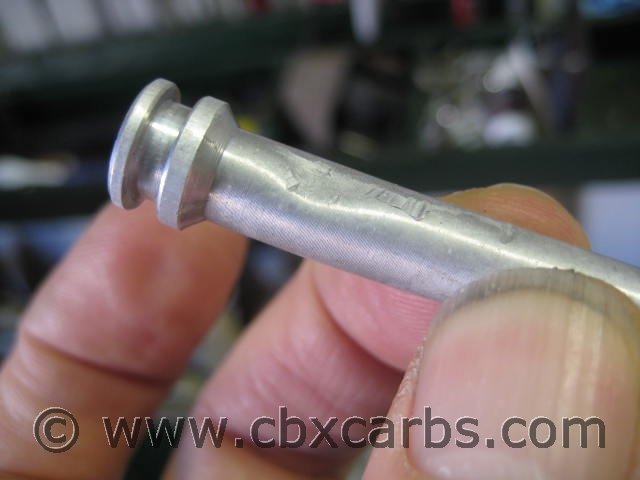
This is one of the results of prying in the wrong place on these carbs, a badly deformed aircut passage tube. I replace twenty or more of these every year.
|
Once the carbs are loose from the engine, loosen the midway adjuster on the opening throttle cable, then swing the carbs out of the frame and now you have plenty of access to get the cables off the carbs.
|
|
|
|
|
|
|
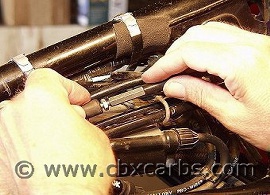
So, "in the reverse order of assembly," right? :-) Start with the throttle bellcrank. Unlike most carbs, the CBX opening cable doesn't have its own hole but rather a convoluted slot into which the cable fits. Do the opening cable first (see the next picture), and keep tension on it so it doesn't fall out of its slot, while you do the closing cable. This is important. Even very experienced people get this wrong and have unexplainable issues because of it.
|
Click on the picture above to go to a video about attaching the cables. Check it out.
|
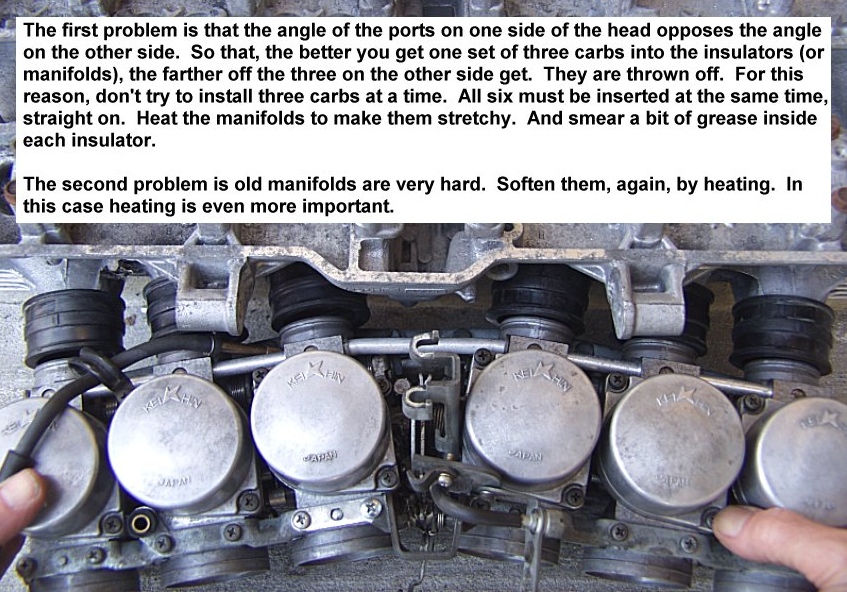
Heat the carb mounts or manifolds with a heat gun, even if they are new or nearly new. If not new, all the more reason to heat them. But even if they're not new, the angle of the CBX carbs makes an interference situation on installation that is best dealt with by making the manifolds as stretchy as possible. This is especially an issue if you are using aftermarket replacement manifolds, as they are made of a less stretchy material than stock. Plop, they'll plop right in!
|
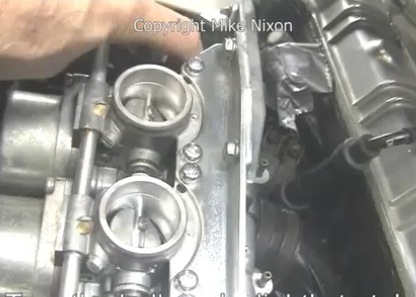
Once the carbs are installed, begin raising the engne and before it is all they way up, start lining up the crankcase breather hose between the crankcase and airbox.
|
With the engine all the way in place, fit and tighten the airbox boots.
|
|
|
|
|
|
|
|
Now reinstall all the stuff you took off -- clutch cable, tach cable, spark plug wires, and ignition wiring.
|
Install the upper rear main engine mount bolt, wiggling the jack if necessary to get it in. And of course all the other engine bolts. Keep all of them loose though, don't tighten yet. Once all the engine bolts are in, remove the jack, allowing the full weight to be on all the mounts, then tighten them, beginning with the large rear upper and then the large front upper and then the small front upper. Refer to the official manual for torque specs.
|
Once the engine is put to bed, mount up the rear of the exhaust, and tighten all of the exhaust up, front and back. Don't forget to lube and adjust your drive chain.
|
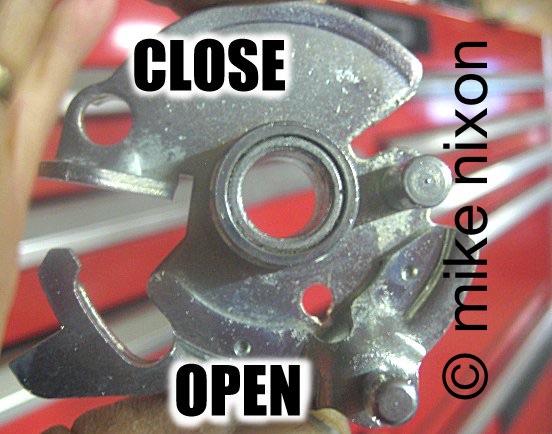
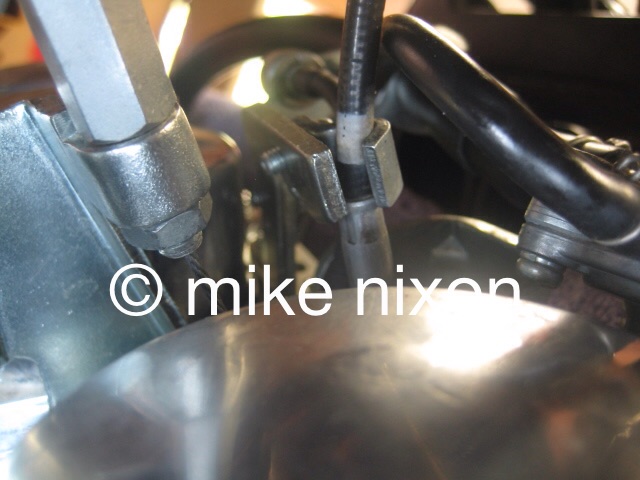
The choke cable on the CBX is a source of a lot of trouble for folks, so take care here. First, you absolutely MUST install the handlebar end first, before the carburetor end. This is because the choke cable has to have a certain amount of slack to work right. Next, be aware that the carb end of the cable does not install intuitively. Instead of the furule (metal end) of the cable being vertically centered in its clamp, it will end up below center, when the slack is correct. Make sure of this or you will have idling problems due to a malfunctioning choke system. Here's another link to the video.
|
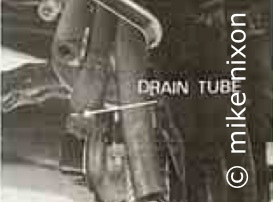
Finally, do your bike a favor and empty your airbox's spuge hose, that is, the hose that collects distailled out grunge from the crankcase vent. There is a hose beneath the airbox with a plug in it (non-U.S. models have just a plain hose with a slit in it). Get that stuff out of there!
|
|
|
|
|
This is why you want to do that. The hose's contents back up and start entering the carburetors, making a sludgy mess that gets all over inside the carbs' vacuum chambers. Let's avoid that happening in your newly cleaned carburetors!
|
|
|
|