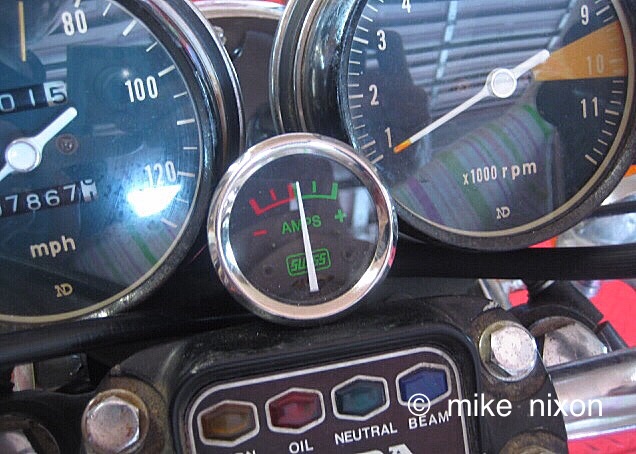
I was at a friend's house until late one evening, back in the middle 70s. It was time to go, and I fired up the bike (a CB500 Four) and almost immediately noticed that the charging system wasn't working. I knew that because the ammeter mounted in the top of the headlight shell was reading steady discharge. After killing the engine and hopping of the machine, a few minutes' probing found a corroded rectifier connector. A little scraping 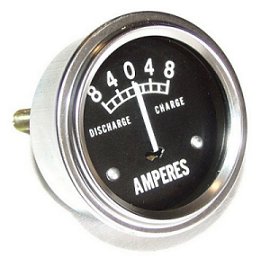 with a pocket knife (the only tool handy) quickly took care of that. I fired up the machine again and noted with the kind of detached satisfaction that only a professional motorcycle mechanic could have, that all was well again. The ammeter was reading happily on the charge side, and I could ride the 40 miles home without concern.
What is It?
The electrical energy coursing though your motorcycle has a couple of important characteristics. One of these is flow. That is, the electricity moves, it is not static. Rather like the water flowing from a faucet. This flow is often referred to as current, and it is measured in amperes, or amps for short. Electricity's other important attribute is pressure. Another way to look at it is to say it has weight. This pressure or weight is the result of the different magnetic power between one place and another in the circuit. We call this pressure volts. Voltage is really just electrical strain, between one place in the circuit and another. That is, the pressure of accumulated electricity that has not yet moved.
Amps and volts are measured with electrical meters. An ammeter indicates the flow of electricity. The heavier the flow, the higher the ammeter reads. If the flow reverses direction, the ammeter indicates that also. A voltmeter on the other hand measures accumulated electrical pressure. The difference between these two instruments is that one (the ammeter) shows electricity on the job and working, while the other (the voltmeter) shows only the afteraffects. One is active, the other is passive.
The History of Ammeter Use in Motor Vehicles
The ammeter was once widely used in cars and on motorcycles. It was important in earlier days to closely monitor electrical activity because the electrical systems were not as robust as they are today. On motorcycles, the pushrod Brit iron (and their unreliable electricals) became the classic home for the ammeter into the early 1970s. By then however, it had already disappeared on the car, and would soon on motorcycles. The reason was so few people understood what the ammeter did. The way its needle wiggled back and forth constantly confused people. Consequently the ammeter fell into disuse, and in many cases was replaced by a light which dutifully stayed off until something went wrong. When charging ceased, the light winked on and stayed on. This so-called "idiot" light (presumably named because the operator is an idiot who waits for it to come on before maintaining the system) is still with us today in most cars. In some of these same vehicles, and others besides, a voltmeter has taken the traditional role that was once the ammeter's. Ammeter use on either car or bike is rare today, the last OEM appearance probably being Kawasaki's ZIR, now a classic.
The Benefits of Installing an Ammeter
Even if your bike has neither light or voltmeter, and that's most machines now, an ammeter is a good thing to have. Remember, the ammeter monitors charging system activity in "real time," unlike the voltmeter whose information is as stale as yesterday's newspaper. When charging system trouble occurs, the ammeter's warning is instant. The voltmeter's response is delayed.
An ammeter looks good in older bikes such as old SOHCs and early Kawasakis and Yamahas. Put it in the headlight shell as in old Brit bikes. A fairing if you have one is also a good place to put an ammeter. Makes that fairing more useful, and it's the easiest way to install an ammeter.
Installing the Ammeter
First, pick an ammeter that has a small range, under 20 amps if possible. Most motorcycles don't charge over that figure, ever. An ammeter that reads to 30 amps or more is going to not be as effective in indicating a problem, because its needle just isn't going to move much.
 Make the opening in the headlight shell or fairing with a hole saw. It will make the cleanest hole, and the this is important if you are going to use one of the motorcycle ammeters that are available. They have very small lips or bezels and so won't hide a sloppily cut hole very well.
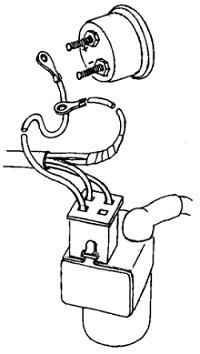
Wire your ammeter in-line with the machine's main fuse. Some old bikes have only one fuse, and some really old ones have none. In that case, look at the battery positive cable. It should have attached to it a smaller wire. Break into that wire and put the ammeter in-line with that wire. DO NOT wire the ammeter into either battery cable. The starter motor will pull between 80 and 150 amps of current through those cables (that is why they are so heavy) and burn up your poor little ammeter.
Speaking of wiring, use fairly heavy wire to wire up your ammeter. Use 14-gauge stranded copper wire. The ammeter is going to be somewhat far from the battery. Its wiring will therefore be long, and extra thickness will prevent the wiring from absorbing too much energy and causing voltage drops. Route the wiring carefully. This can be difficult, but make an effort. You don't want to pinch the wiring in a fork stop, between parts and the frame, or anywhere else. You are carrying high current in this wire. It would be a good idea to wrap it with that curly plastic stuff the racers put on their brake hoses. You can get it from any auto parts store. Remember to solder on the eyelets and solder and insulate your splices.

 ®
®